Rewards Distribution Using Macros
This guide will walk you through creating a web application that enables streaming reward distributions using Superfluid's Distribution Pools and Macro for Batching Calls.
If you want to see the full example, you can check it out in the GitHub Repository.
Overview
The application we'll build allows users to:
- Connect their wallet and validate network
- Select a Superfluid pool
- Add multiple recipients with their respective units
- Set a flow rate for rewards
- Execute all operations in a single transaction
Prerequisites
Before starting, ensure you have:
- Basic knowledge of React and TypeScript
- Node.js installed
- A Web3 wallet (like MetaMask)
- Some ETH on Optimism Sepolia network
Setting Up the Project
- Create a new Next.js project:
npx create-next-app@latest rewards-distribution --typescript --tailwind
cd rewards-distribution
- Install dependencies:
npm install ethers@6 @superfluid-finance/sdk-core
- Install UI components:
npx shadcn-ui@latest init
Understanding the Core Concepts
Superfluid Distribution Pools
Distribution Pools allow for proportional distribution of streaming tokens. Think of it as a smart contract that:
- Manages a pool of tokens
- Distributes streams based on units assigned to recipients
- Handles all the complex token streaming logic
To deploy a Distribution Pool, you can use the GDAv1Forwarder.
Superfluid Macros
Macros allow us to batch multiple operations into a single transaction. In our case, we're using:
MacroForwarder: Contract that executes our macroRewardsMacro: Our custom macro for setting up distributions
In our example, we deployed a RewardsMacro contract on OP Sepolia for the purposes of our example.
Key Components
1. Network Management
First, we need to ensure users are on the correct network:
const OP_SEPOLIA_CHAIN_ID = "0xaa37dc" // 11155420 in hex

const switchToOpSepolia = async () => {
  try {
    await window.ethereum.request({
      method: 'wallet_switchEthereumChain',
      params: [{ chainId: OP_SEPOLIA_CHAIN_ID }],
    });
    return true;
  } catch (switchError) {
    // Handle network switch error
  }
}
2. Pool Validation
We validate the pool address and check user's balance:
const POOL_ABI = ["function superToken() external view returns (ISuperfluidToken)"]
const SUPER_TOKEN_ABI = ["function balanceOf(address account) external view returns (uint256)"]

const checkPoolAndBalance = async () => {
  const poolContract = new ethers.Contract(poolAddress, POOL_ABI, provider);
  const tokenAddress = await poolContract.superToken();
  const tokenContract = new ethers.Contract(tokenAddress, SUPER_TOKEN_ABI, provider);
  const balance = await tokenContract.balanceOf(userAddress);
  // Handle results
}
3. Reward Distribution Setup
The core functionality uses the RewardsMacro contract:
const executeRewardsMacro = async () => {
  // Parse recipients and units
  const receivers = [...] // Array of addresses
  const units = [...] // Array of BigInts

  // Convert flow rate from tokens/day to wei/second
  const weiBigInt = ethers.parseEther(flowRatePerDay)
  const flowRateWeiPerSecond = weiBigInt / BigInt(86400)

  // Get macro parameters
  const params = await rewardsMacro.getParams(
    poolAddress,
    receivers,
    units,
    flowRateWeiPerSecond
  )

  // Execute through MacroForwarder
  await macroForwarder.runMacro(REWARDS_MACRO, params)
}
User Interface

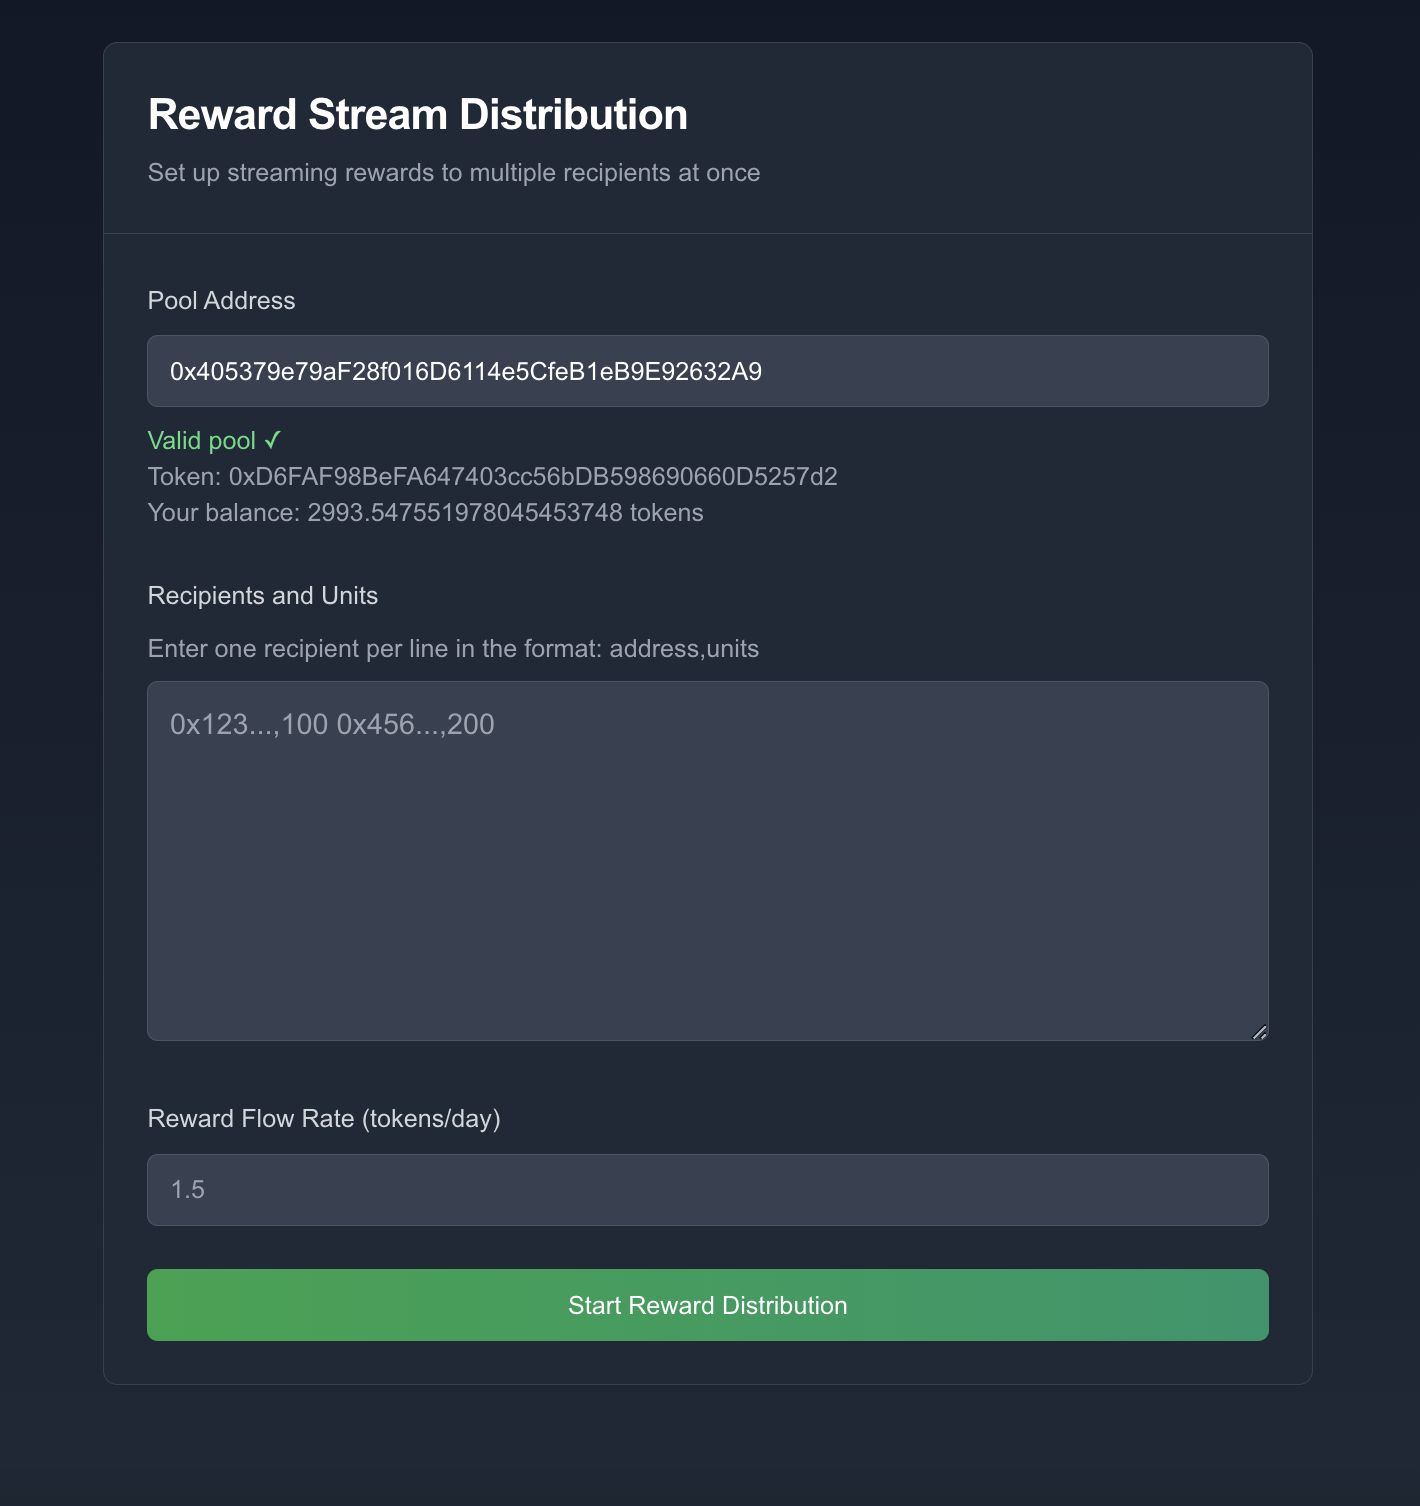
Screenshot of the UI
The UI is built with Tailwind CSS and shadcn/ui components. Key features include:
- Network status indicator
- Pool validation feedback
- Balance display
- Recipients input area
- Flow rate input with conversion
<Card className="max-w-2xl mx-auto bg-gray-800">
  <CardHeader>
    <CardTitle>Reward Stream Distribution</CardTitle>
  </CardHeader>
  <CardContent>
    {/* Network Check */}
    {/* Pool Input */}
    {/* Recipients Input */}
    {/* Flow Rate Input */}
    {/* Execute Button */}
  </CardContent>
</Card>
Testing the Application
-
Deploy the contract and set up your pool
- Deploy the
RewardsMacrocontract on your desired network (you can use the contract deployed on OP Sepolia) - Create your pool using the GDAv1Forwarder
- Ensure you use the correct Super Token for your pool (in our example, we used the Super fake DAI Super Token)
- Deploy the
-
Test the flow:
- Connect wallet
- Enter pool address
- Add recipients
- Set flow rate
- Execute distribution
Common Issues and Solutions
Invalid Pool Address
try {
  await poolContract.superToken()
} catch (e) {
  // Handle invalid pool
}
Insufficient Balance
if (Number(userBalance) === 0) {
  // Disable execution
  // Show warning
}
Network Issues
if (chainId !== OP_SEPOLIA_CHAIN_ID) {
  await switchToOpSepolia()
}
Next Steps
Consider extending the application with:
- Multiple network support
- Distribution history
- Analytics dashboard